My New Build is Ready to be Built! (Pics Inside)

Status
Not open for further replies.
****!!

Installed Windows 7 on the OCZ Vertex in like 7 minutes. Took about 3.5 hours to do the build, dogs bugging me in between steps.

Absolutely an amazing build! My OCZ Vertex is the lowest performer out of my hardware according to the Windows 7 rating...

7.4 CPU
7.7 RAM
7.3 Graphics
7.3 Gaming Graphics
7.0 HDD

Pictures tomorrow! I just barely was able to fit the Megahalems Push-Pull setup, but it's in!

Odd question, when people tell their CPU temps, do they base it off of the listed CPU Temperature, or the individual Core Temperatures?

I just give them a average of all the cores, unless they are asking a specific question.
 
When your looking at a utility like Hardware Monitor the temperature labeled cpu is actually just the cpu socket temperature. The actual temperature of the cpu is given as an individual core temperature, as in, Core#0, Core#1, Core#2 and Core#3. The Core Temperatures should be your biggest concern followed by your Vreg temperature :D
 
My Cores idle between 34-40 C @ 3Ghz and the VREG Temperature idles @ 58 C.

Pictures:
parts.jpg


armor.jpg


megahalems.jpg


icydock.jpg


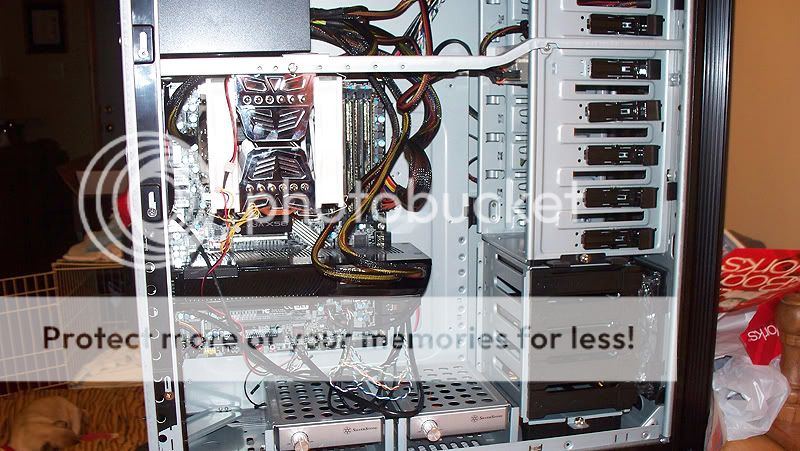
Motherboard in, Ram in, PSU in ..
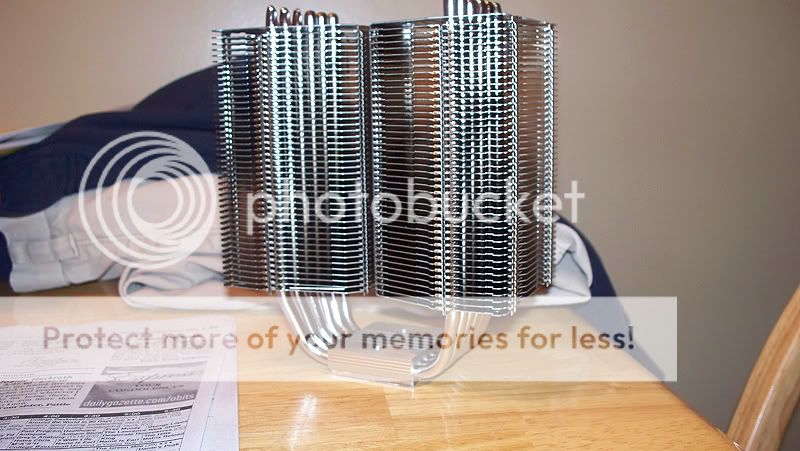
wip1.jpg


Megahalems mounted
wip2.jpg


heatsink2.jpg


Barely fit the second fan on the heatsink.
heatsink.jpg


Final results ... First off, here is my previous build:
oldbuild.jpg

That is how it was used (Except my 280 GTX isn't in there anymore as you can see). Wiring was a disaster, and here I was thinking my old Xaser II was amazing. -_-'

The Core i7..
complete.jpg

Technically, if I wanted to, I guess I could've run the video card PCI plugs through the back but meh, it is still very clean! I absolutely love the ability to hide the cables, and having a modular PSU is definitely worth it.


My Thoughts on the Thermaltake Armor+

PROS:
- Side hard drive mounting.
--- Plugs go through the back, so you can't even tell I have any hard drives in the computer.
- Definitely sturdy.
- Top 4 USB ports, Firewire and Audio.
- Removable motherboard tray, however, I did not use it because the Megahalems is too tall.
- Sliding Powersupply bracket, this allowed me to sneak the 8-plug ATX power cable underneath the PSU
- The extra mounts for fans/hard drives on the bottom of the case. As you can see, I mounted my fan controllers for my Heatsink fans in those spots, which make them very easily accessible.
- Front and rear fans are quite large. Not sure how much air they move, but I suspect it to help some.
- Screwless clips. Took me literally a few seconds to put in my DVD Burner and my 2 Hard Drives.

CONS:
- Front doors .. wtf? I don't understand the purpose of them, and the magnets that hold them closed are pathetic that the doors may just open up by themselves.
- No handle. Top piece is just plastic, and with the weight of the case, it was quite the task picking it up from the bottom..

Overall, I am glad on every decision I have made for this build!
 
My Cores idle between 34-40 C @ 3Ghz and the VREG Temperature idles @ 58 C.

Final results ... First off, here is my previous build:

That is how it was used (Except my 280 GTX isn't in there anymore as you can see). Wiring was a disaster, and here I was thinking my old Xaser II was amazing. -_-'

The Core i7..

Technically, if I wanted to, I guess I could've run the video card PCI plugs through the back but meh, it is still very clean! I absolutely love the ability to hide the cables, and having a modular PSU is definitely worth it.


My Thoughts on the Thermaltake Armor+

PROS:
- Side hard drive mounting.
--- Plugs go through the back, so you can't even tell I have any hard drives in the computer.
- Definitely sturdy.
- Top 4 USB ports, Firewire and Audio.
- Removable motherboard tray, however, I did not use it because the Megahalems is too tall.
- Sliding Powersupply bracket, this allowed me to sneak the 8-plug ATX power cable underneath the PSU
- The extra mounts for fans/hard drives on the bottom of the case. As you can see, I mounted my fan controllers for my Heatsink fans in those spots, which make them very easily accessible.
- Front and rear fans are quite large. Not sure how much air they move, but I suspect it to help some.
- Screwless clips. Took me literally a few seconds to put in my DVD Burner and my 2 Hard Drives.

CONS:
- Front doors .. wtf? I don't understand the purpose of them, and the magnets that hold them closed are pathetic that the doors may just open up by themselves.
- No handle. Top piece is just plastic, and with the weight of the case, it was quite the task picking it up from the bottom..

Overall, I am glad on every decision I have made for this build!

I think the front doors are more for looks than anything. I agree with you they are totally useless. In fact, I just took mine completely off.
 
I think the front doors are more for looks than anything. I agree with you they are totally useless. In fact, I just took mine completely off.

Yeah, not gonna take the doors off but I agree. I think a good idea would've been to make those "doors" a little more narrow and keep them stationary (Not able to open). Make them narrow just to the point you can fit a drive between them. This way, it keeps the design, and isn't so ...... pointless
 
Status
Not open for further replies.
Back
Top Bottom