Project: Server and Gaming Case

Status
Not open for further replies.

Spotswood

Baseband Member
Messages
97
Location
New Hampshire, USA
This is a project/build log for a custom case to house both a storage server and gaming rig.

This fairly compact case is designed to hold:
  • Two EATX motherboards
  • Two ATX PSUs
  • Twenty four 3.5-inch hard drives
  • Six SSDs
  • Two 120x3 water cooling radiators

StorageAndGamingCaseA.jpg


StorageAndGamingCaseB.jpg


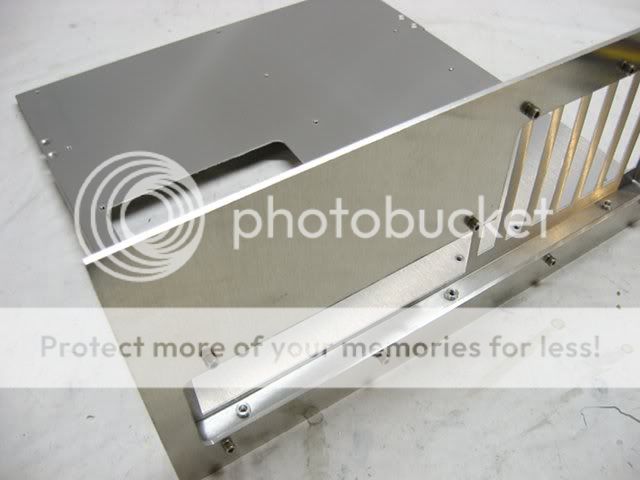
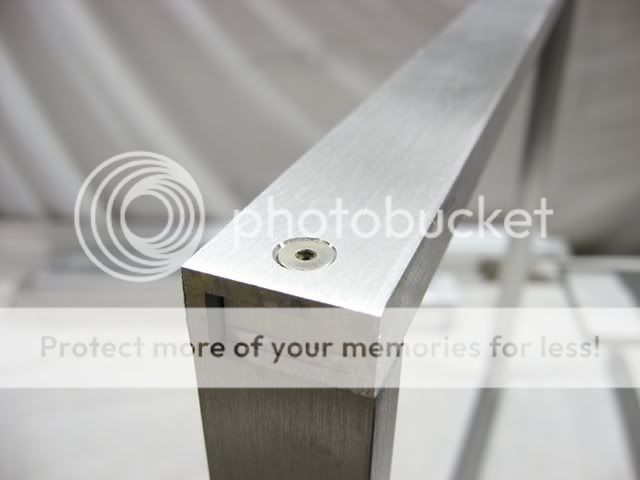
The size of the case is to be kept as small as possible, which is mostly driven by the size of the motherboard trays. But until those arrive, I fabricated the PSU mounting plate from some 2.5mm aluminum sheet.

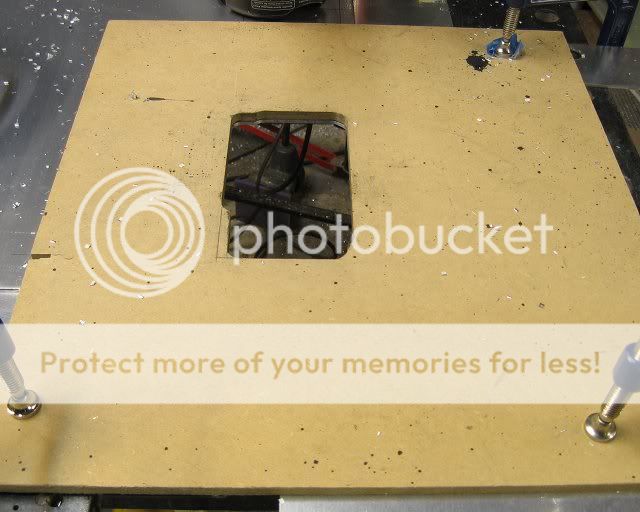
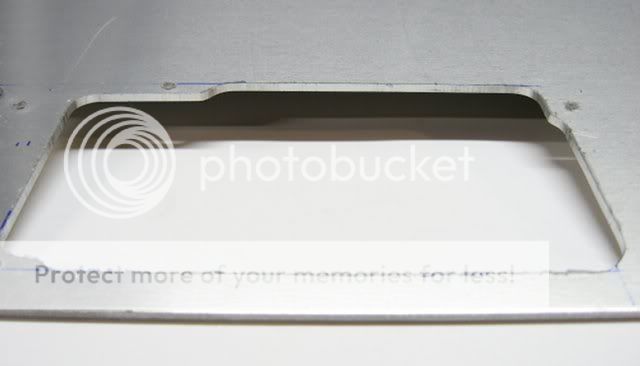
The cutouts were made via a hand held router fitted with a flush pattern bit, guided by a template.

PSUMountingPlateJig.jpg


PSUMountingPlate.jpg


PSUMountingPlateCU.jpg


That's it for now!
 
If he installs the mobo trays to tracks so he can slide them out, then pretty easy. Installing the cables I think would be the hard part. What I don't see happening is the bottom tray having water cooled parts because it doesn't look like there is enough clearing to install the tubes.
 
The backplate of the stock motherboard tray from mountainmods.com was too tall, so I fabricated a shortened duplicate out of .10-inch thick aluminum sheet (once again, via my trusty router fitted with a pattern cutting bit):

MMMBBackPlate.jpg


MBBackPlate.jpg


MBBackPlateCU.jpg
 
This case will be shipped flat-packed so it needs to be easily assembled by the owner. The simple back frame consists of some u-channel with its ends plugged with some blocks press-fitted and pinned with a #4 screw. The blocks have a though-hole into which a #6 1-1/4-inch flat head stainless steel socket cap screw is bolted. Simple, effective, but time consuming to fabricate.


BackFrame.jpg


BackFrameJoint.jpg


BackFrameJointCU.jpg
 
The first step toward routing-out the motherboard cutouts in the back panel was to modify a standard size motherboard router template I had made some time ago.

Existing10slotMBtemplate.jpg


ModifiedMBtemplate.jpg


The modified template was used to create yet another template in 1/2-inch thick particle board.

NewMBRouterTemplateWGuide.jpg


Unfortunately the router wobbled ever so slightly in one spot, but was quickly repaired with some autobody filler:

BondoRepain.jpg


I order to save wear-and-tear on my flush cutting router bit a first pass was done freehand (gulp!) with a standard endmill.

RouterButs.jpg


BackPanelwMBRoughCuts.jpg


BackPanelwMBCutouts.jpg
 
I had to make a new router template for the PSUs cutout. A router guide template is quickly fashioned from some MDF held together with pocket screws.

PocketHoleGuide.jpg


PSUsTemplate.jpg


A mock-up of the back panel:

BackPanelMockup.jpg
 
The posts for the front frame are made from .125 x .5 x 2-inch tubes. First thing was to stuff the bottoms with the screw blocks/nuts in order to eventually attach them to the bottom sheet.

Following standard operating procedure, the aluminum was cut on my miter saw (fitted with a standard carbide tipped blade). The clamp that came with the saw is used to hold the material against the fence.

MiterSaw.jpg


The blocks were then drilled on the drill press with the assistance of my self-centering vice (I love that thing because I don't have to waste time measuring for center).

SelfCenteringVice.jpg


Threads were tapped via my bench mounted "hand" tapper.

BenchTopThreader.jpg


The blocks were pinned to the tubes with flat head self-tapping screws.

PostWCustomNut.jpg


Always looking to improve my speed and quality, the cross supports offered the opportunity to use PEM cinch nuts. The nuts were pressed into the screw blocks.

PEMNuts.jpg


Which were then pinned inside .5 x 1-inch u-channel.


PEMNutAss2.jpg


PEMNutAss1.jpg


FrontFrame2.jpg


FrontFrame1.jpg
 
Status
Not open for further replies.
Back
Top Bottom