Title: Mini Worklog Update + New Features
Date: December 01, 2009
Status: Welcome to my workshop!
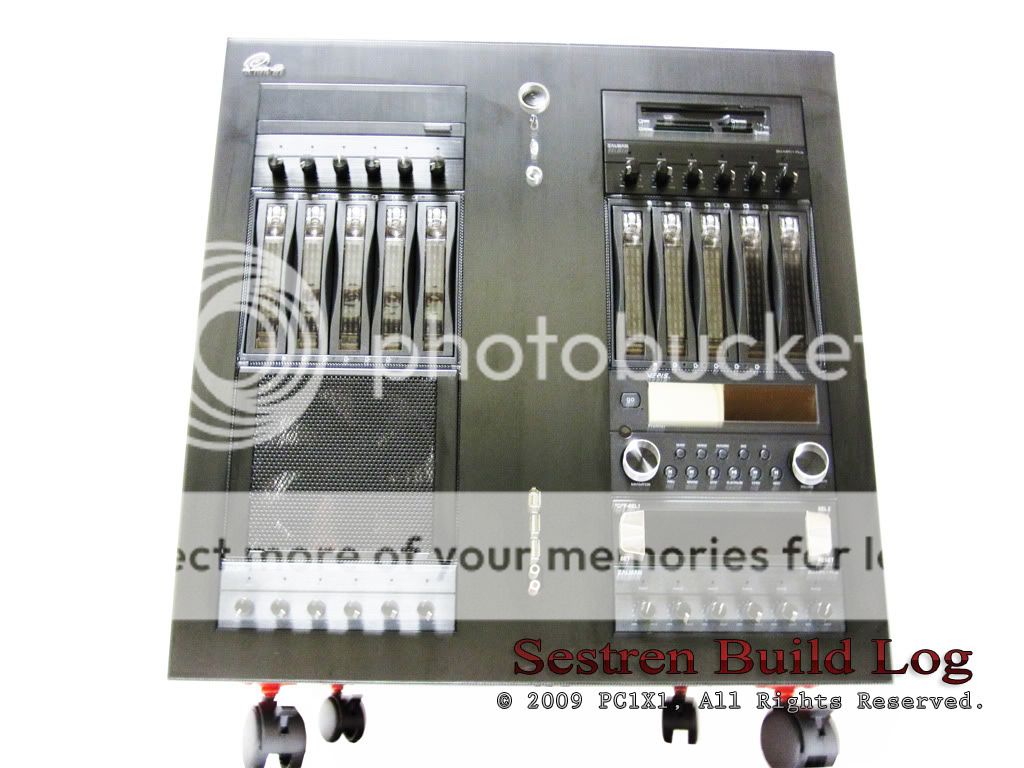
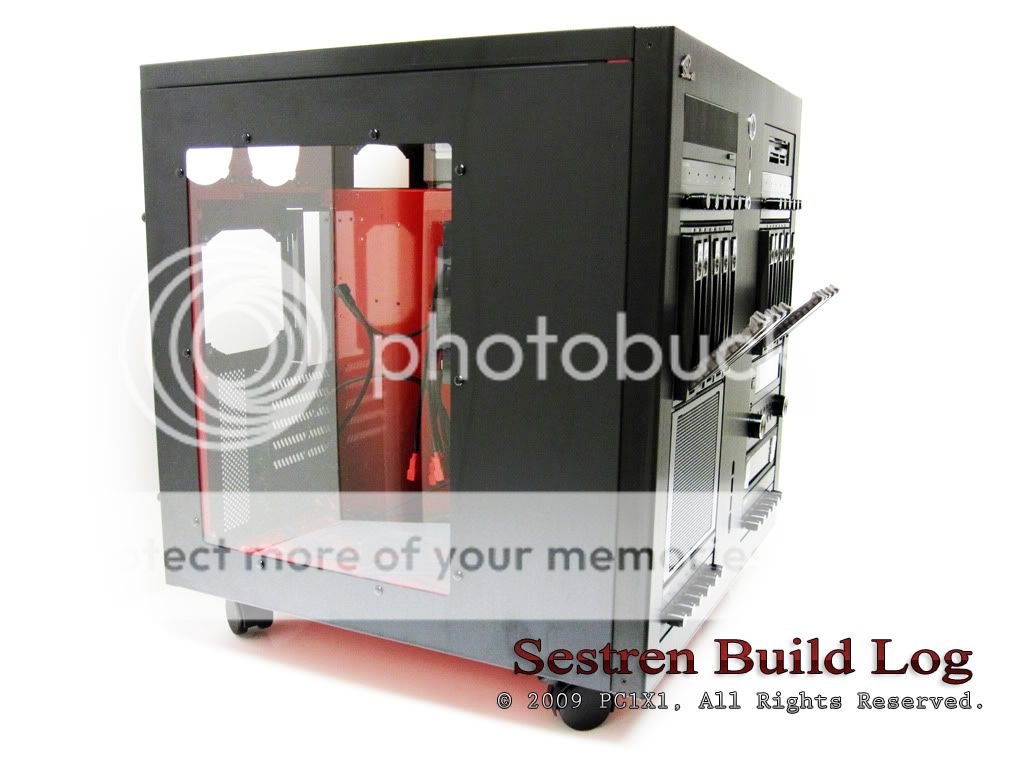
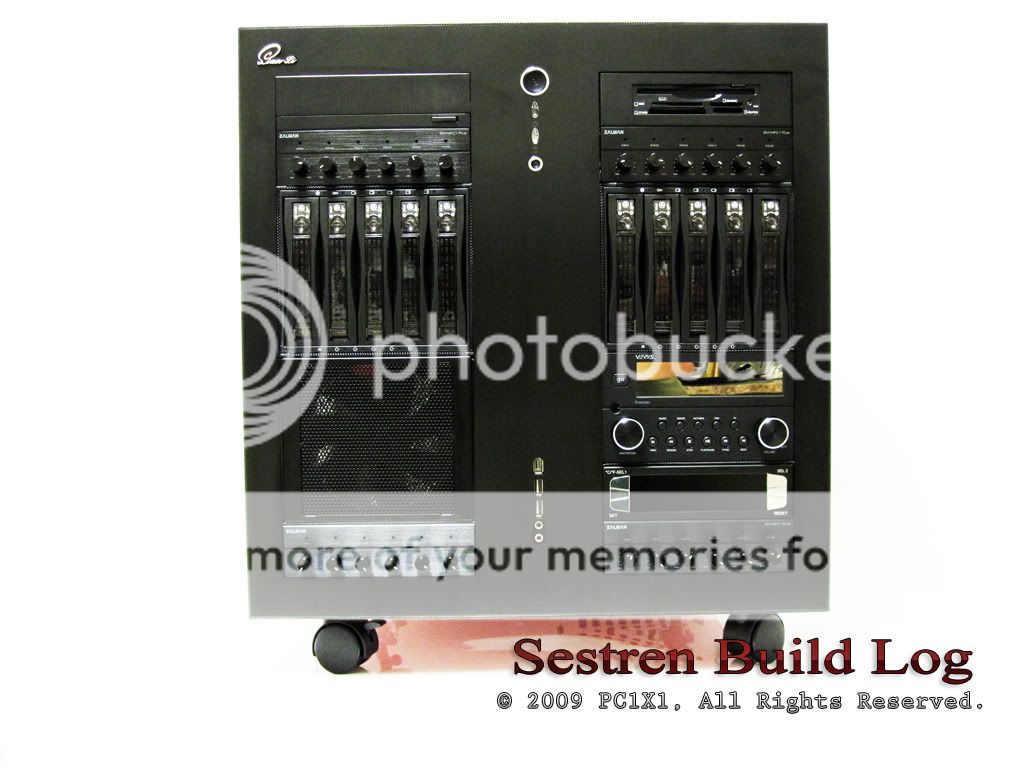
Brief: How's it going everyone! Work continues, and is going well. This is a mini update as I have just finished putting all the drive bays in, so all 18 5.25's drive bays, are now full again") . It was going to go through a live update, but unfortunately takes alot of time and work, so I didn't finish it today. However the first update will go live this weekend, and the second will closely follow it. I have to say, everything came out perfect, the removable motherboard tray made things so much better. Still took forever to align everything though, I'll elaborate next update.
. It was going to go through a live update, but unfortunately takes alot of time and work, so I didn't finish it today. However the first update will go live this weekend, and the second will closely follow it. I have to say, everything came out perfect, the removable motherboard tray made things so much better. Still took forever to align everything though, I'll elaborate next update.
Though today's update features! My brand new Christmas presents. Yup, there goes my Christmas credit, but its very cool and something useful. I got a brand new toolbox, so I put in the tools I mostly use, except my soldering station, and fluids, (artic silver, etc) everything is practically in there. And it looks great to boot, so I was pretty happy with it, so decided to take three pictures. However this isn't just me sharing my cool new toolbox, this was a calculated test, for how chrome reacts to lightning conditions etc, which all of Sestren's fittings are based off, so there is a practical reason to doing this.
Also I am proud to announce a new feature coming soon to the worklog!
...
Video! Yup we are going Web 2.0 (lol) and will now have a video component, I have written the script, and scenes already, just need to shoot it, and figure out how to cut it. If you do video editing, please help haha! I have Adobe Premiere. But I also need your suggestions and what do you guys want to see? Do you want detailed explanations and video going in and out of the case? Do you want sleeving tutorials? etc.. etc.. I am still figuring out how I am going to do this, but it will be showing up in one of these future updates, and coming quite soon.
The Icon is even ready
Coming soon! To computer monitors near you! ( No clicking on it yet, not set up, but will be in one the next updates! )

Take care,
- PC1X1

Tool Box Review:

Description: Here's my brand new toolbox, its pretty big, and quite heavy. The thing is really sturdy which is a plus, though like I mentioned, its a bit hard to carry around. Quality is top notch, and I definitely recommend this company's quality. No idea on price, since I just got it as a early Christmas present, but I am very happy with it. Fit and Finish are top tier.

Description: Here's the profile view, there you can see the warning label, showing you that it is pretty heavy. The sliding trays are very smooth, and nice, also I like the fact I can lock all the tools inside as well. Can't steal them now, albeit you can steal the entire case X_X. Also comes with this foam backing in the bottom, that holds the tools in place, and protects them and the case from scratches. Very nice touch.

Description: Tada! Tools, hurray, this is all the basic things you need for modding and computer building. Of course, I still have three more tool boxes with crap, I used to build Sestren, as well as the actual power tools and their boxes, so everytime I work on this thing, its a party, the entire house is filled with various toolboxes with stuff! I am a big Do it yourself person, so I actually do anything I possibly can, so lots of crap. But I put most of the stuff I use constantly for computer building in here, and a small carry toolbox, with screwdrivers and stuff, so with those two I am ready for any computing challenge! I hope at least!
Date: December 01, 2009
Status: Welcome to my workshop!
Brief: How's it going everyone! Work continues, and is going well. This is a mini update as I have just finished putting all the drive bays in, so all 18 5.25's drive bays, are now full again
. It was going to go through a live update, but unfortunately takes alot of time and work, so I didn't finish it today. However the first update will go live this weekend, and the second will closely follow it. I have to say, everything came out perfect, the removable motherboard tray made things so much better. Still took forever to align everything though, I'll elaborate next update.Though today's update features! My brand new Christmas presents. Yup, there goes my Christmas credit, but its very cool and something useful. I got a brand new toolbox, so I put in the tools I mostly use, except my soldering station, and fluids, (artic silver, etc) everything is practically in there. And it looks great to boot, so I was pretty happy with it, so decided to take three pictures. However this isn't just me sharing my cool new toolbox, this was a calculated test, for how chrome reacts to lightning conditions etc, which all of Sestren's fittings are based off, so there is a practical reason to doing this
.Also I am proud to announce a new feature coming soon to the worklog!
...
Video! Yup we are going Web 2.0 (lol) and will now have a video component, I have written the script, and scenes already, just need to shoot it, and figure out how to cut it. If you do video editing, please help haha! I have Adobe Premiere. But I also need your suggestions and what do you guys want to see? Do you want detailed explanations and video going in and out of the case? Do you want sleeving tutorials? etc.. etc.. I am still figuring out how I am going to do this, but it will be showing up in one of these future updates, and coming quite soon.
The Icon is even ready
Coming soon! To computer monitors near you! ( No clicking on it yet, not set up, but will be in one the next updates! )
Take care,
- PC1X1
Tool Box Review:
Description: Here's my brand new toolbox, its pretty big, and quite heavy. The thing is really sturdy which is a plus, though like I mentioned, its a bit hard to carry around. Quality is top notch, and I definitely recommend this company's quality. No idea on price, since I just got it as a early Christmas present, but I am very happy with it. Fit and Finish are top tier.
Description: Here's the profile view, there you can see the warning label, showing you that it is pretty heavy. The sliding trays are very smooth, and nice, also I like the fact I can lock all the tools inside as well. Can't steal them now, albeit you can steal the entire case X_X. Also comes with this foam backing in the bottom, that holds the tools in place, and protects them and the case from scratches. Very nice touch.
Description: Tada! Tools, hurray, this is all the basic things you need for modding and computer building. Of course, I still have three more tool boxes with crap, I used to build Sestren, as well as the actual power tools and their boxes, so everytime I work on this thing, its a party, the entire house is filled with various toolboxes with stuff! I am a big Do it yourself person, so I actually do anything I possibly can, so lots of crap. But I put most of the stuff I use constantly for computer building in here, and a small carry toolbox, with screwdrivers and stuff, so with those two I am ready for any computing challenge! I hope at least!