Project Sestren Worklog - World's First Back/Outside Mounted Tri Loop Cube!

Status
Not open for further replies.
Yeah me too... I can't wait to see the finished results!

Thanks, the goal is to bring them by Dec, slowing down a little for 2 weeks, to get catch up on life, then ramping up nonstop until its Finished in Dec!

Thanks alot! for dropping by, its great motivation.

Title: Quick Status Update
Date: October 23, 2009
Status: Incoming Update!

Brief: Hi Guys, sorry for taking a little while, just have been swamped this week, so I am going to slow down a little for the next two weeks, as I prepare for the next updates, also I need to find a way to secure more funds for the build, so I need to concentrate on that. Otherwise everything is going good, all theory is pretty much set.

As your aware I been delayed since I built Temporary Sestren, aka Tower, but its working good now, and I have full hang of Windows 7, I may do a explanation on some things if you guys are interested on Windows 7 itself. Anyhow back to work, and expect an update most likely tomorrow night, Eastern Standard Time.

Thanks! And sorry for not updating sooner, didn't want to update without pics! But also want you to know I am on the job!

Take care,

- PC
 
Title: Worklog Update
Date: November 01, 2009
Status: The Cube returns to form!

Brief: Good evening everyone, work resumes full steam ahead as of right now. As many of you are aware. I did push my time tables back a bit due to the following reasons; I am still in the process of securing parts for Sestren. I am currently waiting for MNPCTech's graciously sorting my last order. And in the meantime I set up my temporary computer, Tower. Which was quite a jump from my previous Pentium 805D. To be completely honest, this Q9550, 4 gigs of Ram, 3870x2, F1 Raid 0, is mostly sufficient for most of my needs. I also had to endure a complete OS change and migration from Windows XP Pro 32x, to Windows 7 Ultimate x64. Tower is much faster than the previous Sestren, as the jump from Pentium 805D to Core 2 Quad, is pretty significant. In some areas, it exceeded my expectations, in some it lacked. However in the lacking I believe that is due to hardrive limitations, even in Raid 0. I will further investigate once I move to four SSD drives Raid 0.

However as humans, we need to progress. So one must push boundaries, test limits, and evolve, so with that said. Work resumes on Sestren at full speed ahead. The time tables still fall on this Month of November to December for Sestren to be ready. I may also possibly feature an article on my transition to Windows 7, its been mostly positive, and I can suggest everyone to upgrade should they need to, however it wasn't without its quirks, and there's still some software and compability issues, but overall It was one of my most pleasant OS transitions, and a fun ride. However that is for a later time, and possibly a different medium, right now the focus is on the worklog. So please enjoy this quadruple dose of updates, since I took a little while to format this one, and be prepared for alot of content coming your way. Especially if I can secure more parts soon. This is just getting the case ready, parts are already going in, and as soon as I have confirmation on more stuff coming. I will update. I am waiting to see how the Radeon 5890 stacks up vs. Fermi x2 to decide. More parts are coming in, so definitely check back these weeks as there are bound to be updates.

Left to come!
CPU
Motherboard
6x DDR3 Ram
PSU
4x 2.5 to 3.5 HDD converters
4x SSD's
2x Graphics Card x2
Water Cooling Fittings
Water Piping Cutter

Take care,

- PC1X1


SestrenBuildLogWorklogUpdate.png

IMG_0160.jpg

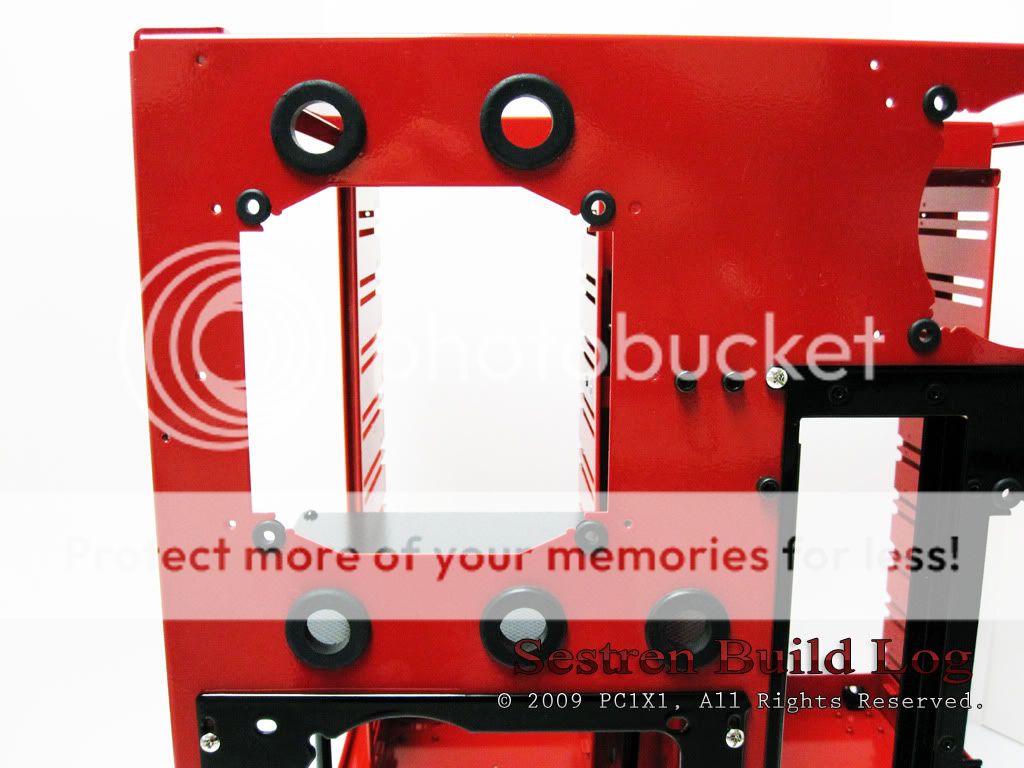
Description: The great assembly had begun! Here you can start seeing how the colors will match and accent one another. Also note how all plastic parts are painted black, and the new 3 screws on the facade of the cube, are part of the removable motherboard tray mod. So indeed the tray is removable and looks pretty good in my humble opinion.

IMG_0161.jpg

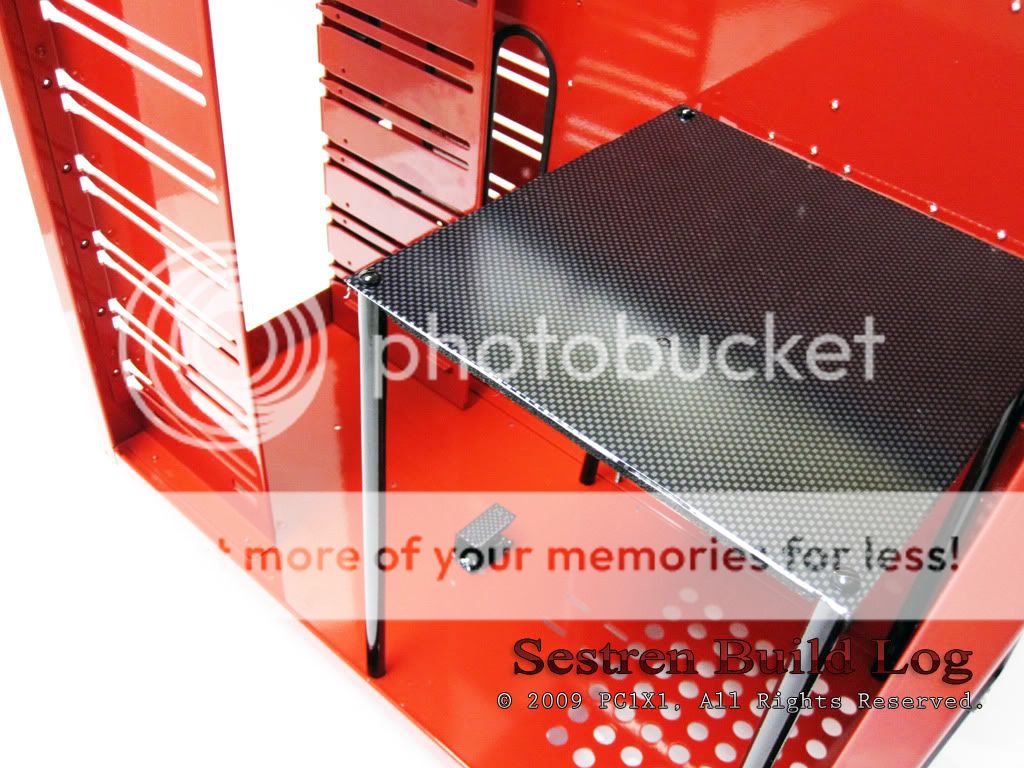
Description: Here's a profile shot that features the hardware side of the cube. The right side is where all the water cooling, and accessories, lights etc.. will reside. The top plate that holds pump #3, now has a carbon fiber trim. On the right side, left side of the bay you can see two silver screws, and some carbon fiber trim, that's part of the removable motherboard tray. It was quite difficult to counter sink the screws so they wouldn't scrape the actual bay hardware. However in the end it came out pretty good I think. The little carbon fiber guy in the bottom of the right side is there to help hold up the Power Supply Unit.

IMG_0162.jpg

Description: Another shot of the the cube's skeleton, here is a front shot that portrays the cube in all its towering glory. Again check out the details and screws from the removable motherboard tray, and the painted plastic hinges, that hold the front panel.

IMG_0163.jpg

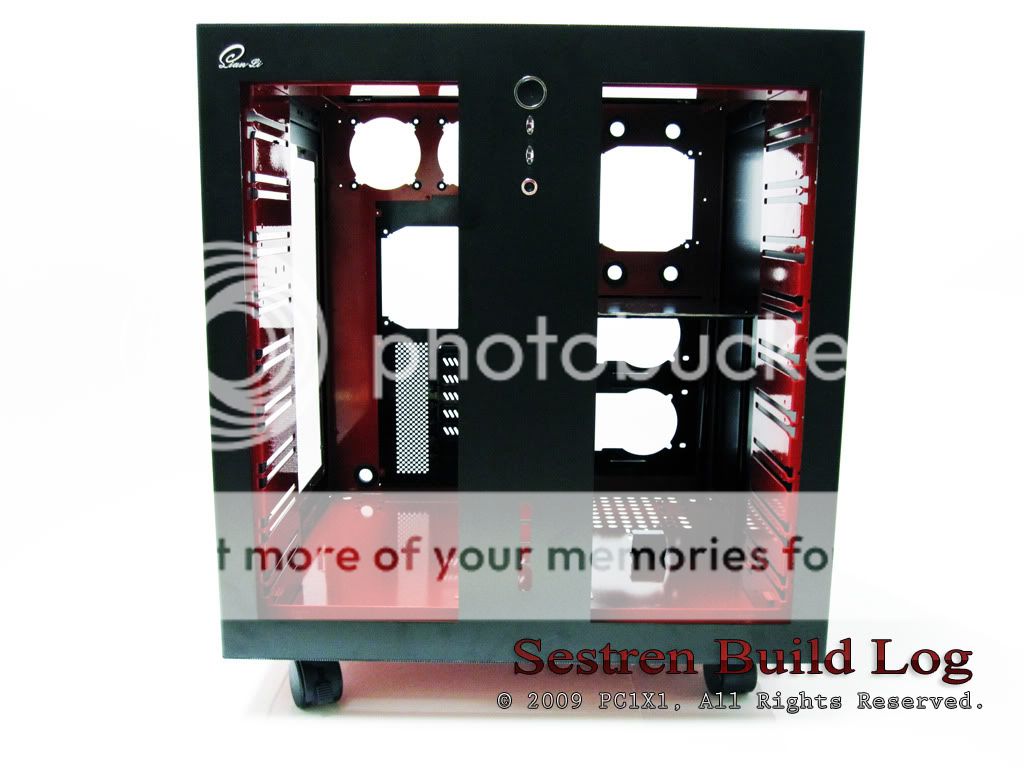
Description: Here's an up shot of the cube. You can see its glossy red appearance, and its details. The black motherboard end plate contrasts really well.

IMG_0165.jpg

Description: Here's a frontal shot of the motherboard side for the cube's skeleton. As you may have noticed, the cube is divided into two main compartments. I took advantage of this fact, and divided all working hardware in the Motherboard side, and all accessories and support hardware in the right side. The paint is nice and glossy, and again the black trim, and intentional use of blacks to contrast the red looks pretty cool. Notice how the wheels also join the form now.

IMG_0166.jpg

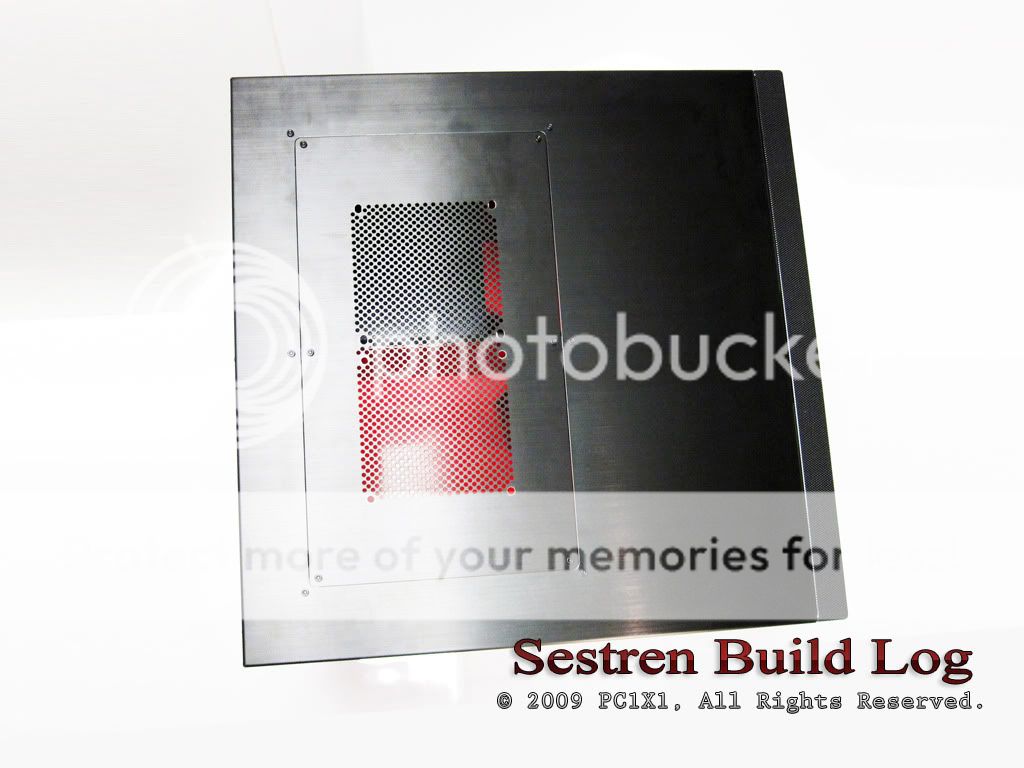
Description: Here's a close shot of the back plate. The cube while not longer than a standard computer case, is indeed much wider. So you can see that while being a standard 7x End plate, the width from motherboard to actual computer window is pretty large. That gives me alot of room to play with the water cooling and cable routing. Again the end plate was made as a contrast, and looks pretty cool in my opinion, once hardware is installed, it should contrast and blend even better. It also serves as a focal point to draw your eyes.

IMG_0167.jpg

Description: Here's is the back of the cube in all its naked glory. Luckily this post is safe for work. Here you can see that the PSU end plate is also powder coated black. And contrasts with the red of the cube. While the red is the main color of the skeleton, once the cube is fully assembled, all the pieces will make sense.

IMG_0168.jpg

Description: Here's a close up shot of the 120mm Fan exhaust, and the opening for the tubing from the 2 main 360mm radiators. You can also see an upclose shot of the motherboard tray screws. I really like these screws. Also the metallic Lian Li screws also look very good, and when all the water cooling chrome fittings are in, everything will be themed and harmonious.
 
SestrenBuildLogWorklogUpdate.png

IMG_0170.jpg

Description: Here's a towering view of the back side, and you can see how everything complements one another. Also the anti vibration grommets also worked and matched very well to the water cooling grommets.

IMG_0171.jpg

Description: Here's a front view of the right side bay. Here's where all the accessories will reside, and on top of the carbon fiber table, is where pump #3 will go. Under will be the two power supply units.

IMG_0172.jpg

Description: An up-close shot of the carbon fiber trim on the pump housing, this was a custom made mod, to gain upward space on the cube.

IMG_0173.jpg

Description: Aeriel view of the cube

IMG_0174.jpg

Description: Complete shot of the cube from above. Some say it was taken by a spy satellite.

IMG_0176.jpg

Description: aeriel view from another angle.

IMG_0177.jpg

Description: Here's a shot of the underside of Sestren. You can again view more screws from the removable motherboard tray, I made that tray removable, because it was a pain in the butt, to add and remove bay hardware. The ray is held in place by 9 screws, and 2 side screws, for a total of 11 screws. Notice that the cube is defying the laws of physics, and no I did not rotate that picture in post processing, Its actually being held up physically in that position.

IMG_0178.jpg

Description: Another artistic shot of the cube defying the laws of physics, so you can view it from yet another angle. It may be propped up somehow, or possibly it has magical powers.

IMG_0179.jpg

Description: Here's the back aerial view of the cube, and the final installment of the cube skeleton.
 
Title: Worklog Update
Date: November 01, 2009
Status: Let the great assembly begin!

Brief: Continuing from my previous update, since I owe you guys for not updating for a little while. This is the beginning of putting all the parts together again, once this part is finished, which it is in this update. I will be working straight on putting all the parts back on. Which is most likely what the next update will feature. First all front bays come back in, then I go into water cooling, then hardware. So certainly stay tuned, things are heating up.

Until next time,

- PC1X1


SestrenBuildLogWorklogUpdate.png

IMG_0180.jpg

Description: Like the mighty Voltron, the cube has assembled itself, and now you can start fully visualization, my vision for the theme and motif of this project. Classy on the outside, fiery red hot on the inside.

IMG_0181.jpg

Description: Here's a profile shot of the cube fully assembled, keep in mind, this is case only. The parts are coming in the next update, however looks pretty hawt if I may just say so myself.

IMG_0182.jpg

Description: Another angle side view of the cube, you can see all the parts fitted pretty nicely. The main problem on painting something is that it adds a small extra later to the dimensions of the original object. While this is no exception, the powder coat and sand blasting etc, were well done, because the cube fitted basically perfectly.

IMG_0184.jpg

Description: This is a frontal shot of the cube, while similar to the first shot, its actually differs in angle and altitude. This shot is a great showcase for how the colors contrast one another, and how there's a HDR/Bloom effect on the paint due to colors and gloss. Once actual hardware also goes in, the effect will be complete.

IMG_0187.jpg

Description: This shot is an aerial frontal shot, that differs a view degrees from the rest. Its emphasizes the cube's outwardly proportions and just how big it is. Again the colors and lighting make it appealing to look at it. All these front bays will be filled up quite soon.

IMG_0189.jpg

Description: Here's yet another frontal shot, because it came out pretty cool. However on this shot, lighting inside is heightened, just like it will be when all the CCFL or cold cathodes light up the cube from the inside.

IMG_0191.jpg

Description: Another frontal..... just kidding, here's a cool side view the cube. This is a good representation of how and what I will see when it is finished. Of course hardware will be in there, but one can start seeing and imaging how it will look fully integrated.

IMG_0193.jpg

Description: Side aerial view of the motherboard side of Sestren. You can also see now how the back blends in and works the entire theme throughout. Also looks artsy and avant garde.

IMG_0194.jpg

Description: This shot is similar to the previous one, however instead of looking at it in a micro scale for the details, you can see the whole picture.
 
SestrenBuildLogWorklogUpdate.png

IMG_0195.jpg

Description: Now flipping to the front, you can get an idea how the entire project meshes together.

IMG_0197.jpg

Description: Considering we covered almost every shot and angle known to man, the only way we haven't gone on this update is up. Well now we did! Recall this is where the 240mm radiator will be mounted.

IMG_0199.jpg

Description: Aerial view of the cube

IMG_0202.jpg

Description: This is a cool shot of the back, because now with the roof, and sides, all the blacks are fully represented, and now join each other in contrasting the Red interior. When designer this project, this is what I envisioned, and it came out pretty close to how I wanted. So I am pretty happy with the results. Can't wait to add the hardware in there, to complete the cycle.

IMG_0203.jpg

Description: Here's an upclose shot of the back, while similar to the skeleton shot of the back, when we add the roof, and the sides, the lighting and aesthetics of the cube change. And that's important, because I have to preplan each step as a finished product and not a phase. However this part came out just like I wanted, as the lighting is good, and not overwhelming, the red and black stick the classy, yet ret hot motif exactly.

IMG_0204.jpg

Description: Here's the back from another angle. Keep in mind there will also be radiators eventually attached, so that will further balance the color proportions.

IMG_0205.jpg

Description: And finally but surely not least, the last picture of this particular update. Another picture of the front of the cube, however in its towering form. This picture is the perfect example of what I wanted from this color scheme. The angle, the contrasts, where the shadows hit, everything flows, and that's for now, the biggest accomplishment of this build. Going further I hope to improve and expand this concept. So stay tuned!!!
 
Status
Not open for further replies.
Back
Top Bottom